Friday, September 22, 2017

Sailing in the Algarve, One More Time!


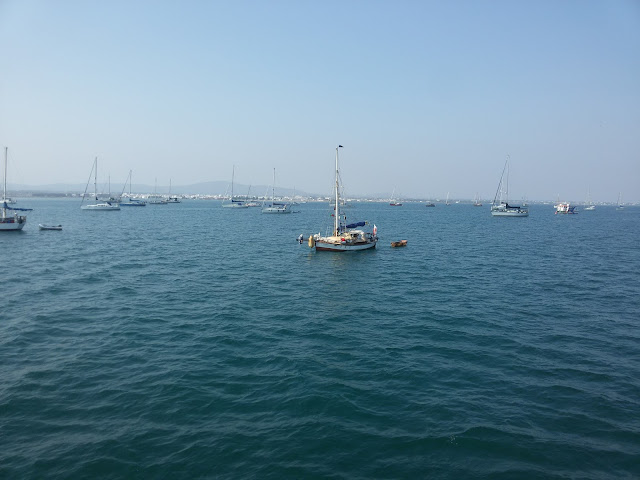
Anchoring in Culatra
In Culatra on the kayak, taken with my cheap Rollei action cam.
In the early morning of July 22, I untied the lines and sailed south solo.

I sailed - using the sails - most of the way, in real sloppy seas most of the time. On the way, I anchored in Cascais, Sines, Alvor and Culatra. No marina for me. I did enter the Albufeira marina, but only for diesel and water.

If you're planning to enter Alvor's inner anchorage, you'll need a rising tide to get in. The channel is a mess - and if you follow the buoys, you'll run aground good and proper. I saw a guy standing in water to his waist next to the green buoy!! No wonder hardly any boats venture into the anchorage anymore. The place is filled mostly with boats hanging on moorings, many of which are semi-abandoned.

Alvor channel

Anyway, I bought a Rollei action cam to film something interesting. That "something interesting" was possibly the fiercest conditions I've ever experienced sailing from Sagres to Lagos on a hot summer afternoon. 

On reaching Martinhal Beach, the wind came blasting from the hills like a sledgehammer, and I kicked myself for not putting in the third reef. With three reefs, I could have had a decent sail to Alvor. Instead, with 2 reefs and the stay sail, I got a forced workout at the wheel doing 7+ knots, dodging a labyrinth of the usual lobster pots, with the odd wind-driven chop slapping the hull, spraying the deck and getting me wet.

I was facing 14 miles of excitement and my Rollei action cam was somewhere down below doing nothing. Little details like that really piss me off. You had to be there, and you could have been there by watching it on film. Got wet and excited and nothing to show for it.

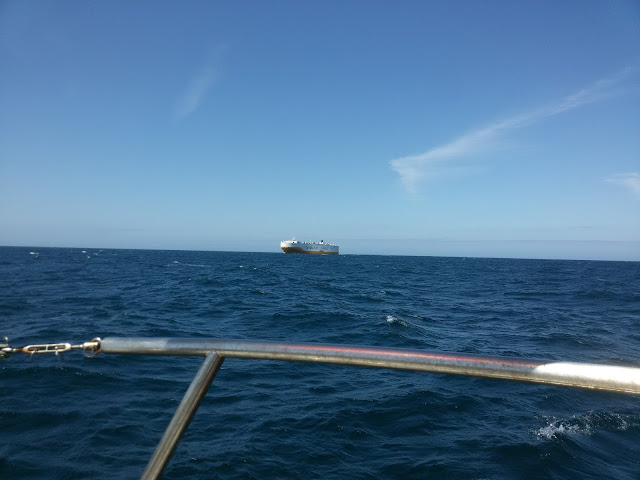
On the way to Sines, I had an encounter with the ship. I was sailing, and he was approaching land going into Setubal, probably to pick up a load of cars.

Ships going to Setubal

 I had to change direction to avoid it, even though I had the right of way. Size matters.


One lazy day in Culatra, hanging out on the boat, I had the privilege to witness another anchor dragging fiasco when the breeze picked up to a whopping 15 knots.

A young (by cruiser standards) British guy on a big modern boat and I went to the rescue of three boats dragging as though they had a brick for an anchor.

In one case, we were about to board a Spanish boat, when a barking dog charged through the companionway followed by a naked woman. She was having a siesta while the husband was at somebody else's boat. She popped down below to put on a T-shirt and shorts, came back out, started the engine and, motored around aimlessly dragging the anchor along the bottom until her husband arrived.

Later, I saw what could be my future sailboat going by. It looked really small from a distance, probably even more so up close, in an anchorage full of cruising boats.

sun fast 26
Sun Fast 26. Could it be the one?
Bigger than the funky boat below. I was really curious to see the owner, and he was around because the boat moved a few times. But no luck. He/she either used it only to sleep or spent all the time sleeping down below in the tiny cabin.

Olhao anchorage

After 15 years of sailing to the Algarve, I'm beginning to feel repetitious. Instead of changing the destination, I think I'll change boats.



Sunday, July 9, 2017

Almost Ready to Sail South Soon

The "Before and After" photo shoot

About 1 year ago, I had a minor accident in Nazaré during a haulout. The stern pulpit and stern boarding ladder got an ugly bruising.

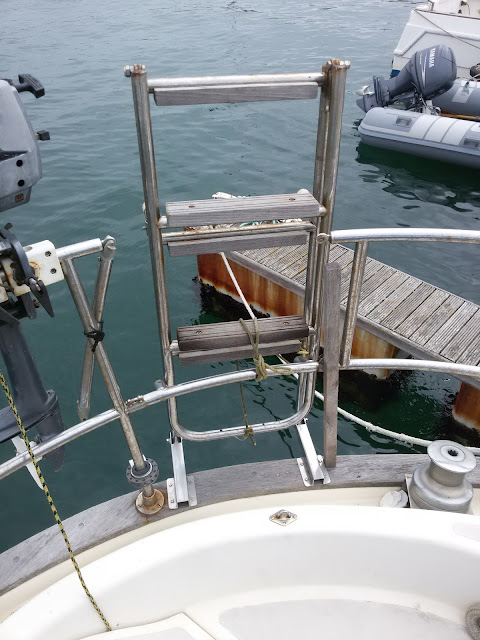
I straightened the pulpit as best as I could using the main halyard and winch, brute force, etc. I spent nearly a year idealising the perfect boarding ladder setup. I took pictures of other boats, I Googled it, I fell asleep think about it. A while back, I took the detailed schematic drawing to a local metal shop. The owner's son, who was also raised in Canada, looked at my drawing for about 1 minute and asked, "why don't we do this instead?" Which is what you see below - PERFECT!! (38 euros). The guy, Emanuel, is a genius, I tell you...at least compared to me. 

The ladder now folds up, and then swivels onto the railing, instead of hanging off the transom like a dilapidated eyesore. Steady as a rock too.
Stern boarding ladder

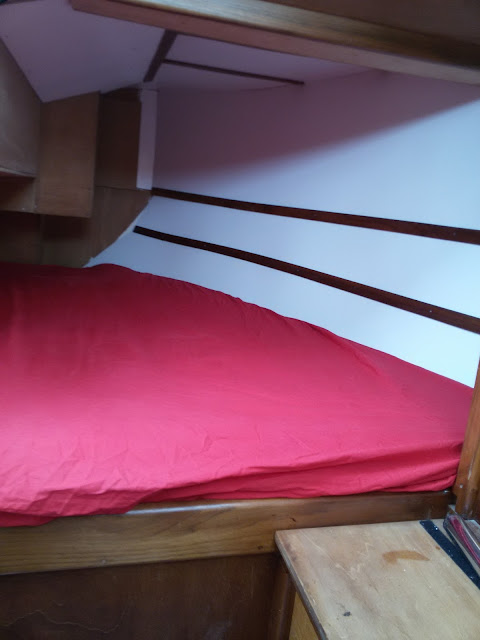
This is the quarter berth after removing most of the cheap rotting decorative plywood.

And this is the new look. Komacel for boat interior work is the way to go. I still need to finish the trim, paint some of the wood and varnish some pieces.
Komacel for boat interior

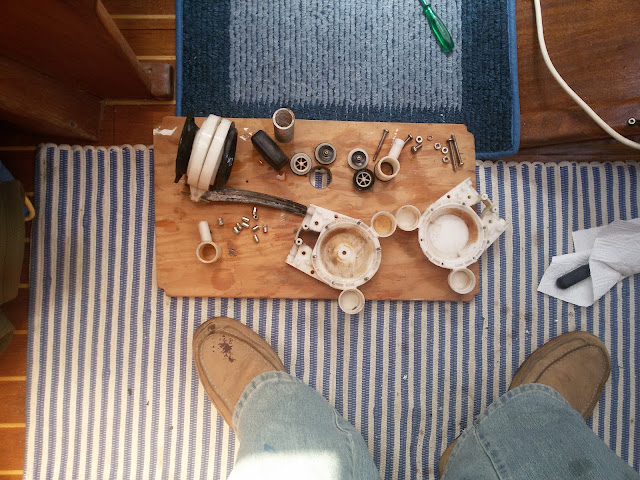
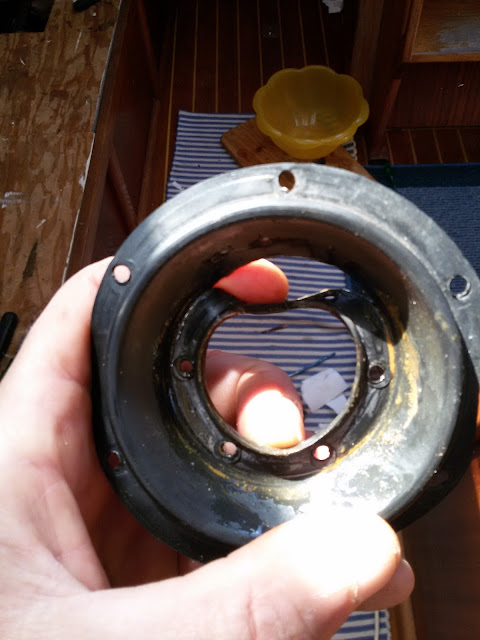
And this is my old water foot pump, that failed and which I totally destroyed in an attempt to fix it. It worked flawlessly for 16 years, so can't complain, I suppose.
Foot water pump

Here's the replacement pump which I ordered on Ebay from Greece - of all places (€67). I could have bought a Whale gusher pump for a few more euros, but this is the exact same TMC pump model as the old one (built in Taiwan), and it was an easy install without needing to drill more holes.
TMC water pump

A sliver of wood somehow got into the water tank and perforated one of the old pump's diaphragms. To prevent any other foreign objects from killing the new pump, I installed a filter in the intake hose. Not being stupid twice is almost as good as being genuinely intelligent.
intake hose filter

And now, for the last "Before and After" picture, this is me back in Canada living on the farm operating a Belarus tractor, one of our Russian tractors.
Belarus tractor

This is me now on a BAD DAY, working on the boat wondering where all the fun - and hair - went.

Wednesday, May 24, 2017

Water Pump Mechanic - Episode 2

In my last post, I said I could now disassemble and assemble a foot pump in a flash. I was wrong. I should have said that "I can now destroy a pump pretty damn fast!"

In case you didn't read my last post (and I don't blame you because it's really boring), I fixed the foot water pump...sort of...it started working again but leaked like a waterfall.

I took it apart again, so fast and easily that it didn't satisfy the mechanic's itch. The diaphragms "seemed" a bit loose so I disassemble them too. Then I tightened them real good, so good one split open.

foot water pump
It's fixed for ever and an eon.
My boat is naked, but I cannot live without a galley water pump, gotta have at least one.

My next victim was the electric water pump which I haven't used in years. Why? Because I ruined the pressure switch by running the tap with just a dribble to save water. Which means the switch kept going on and off like a machine gun. And, yes, I confess, it was the second pump I dispatched in that manner (fools never learn). Not finding a switch for sale, I bought a new pump. Those were the days I was still making good money.

Plastimo water pump
Removed the Plastimo water pump from the bilge.

Parts for Plastimo water pump
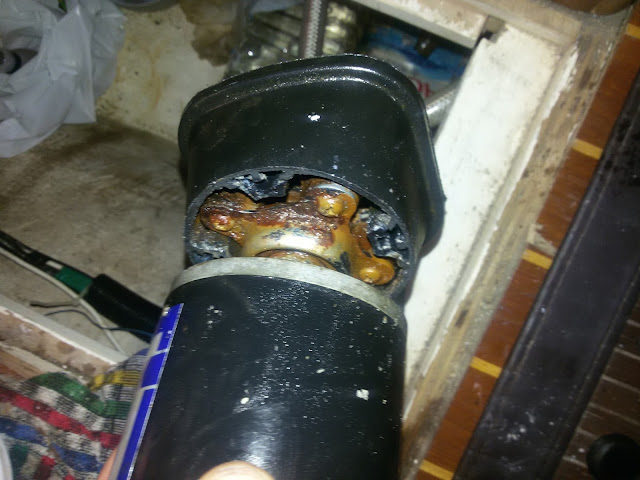
It was pumping great when I last used it about 6 years ago. Now the pump part is full of crud and won't spin. The motor spins like it was new.
I placed it in a small container, poured vinegar to cover the bottom cruddy part and let it soak for a few days.

After all that work and after washing the dishes from lunch by pouring water from a jug (highly ineffective and messy), I went for a stroll around the marina.

Replica of Slocam's Spray
An acquaintance of mine stopped over on his way to the Algarve on a replica of Slocum's Spray, which he built himself out of plywood in record time.
Epilogue

The vinegar dissolved most of the crud and the motor worked perfectly. But when I attached the pump section, it just stuck. A little grunt and nothing more. I hit it repeatedly with a rubber mallet, swore, threatened it with fierce-looking vice-grips. Nothing. Merda!

Back at home, a Youtube video taught me that the bearing is seized. OK, so now I know how it works, which was beyond my comprehension. No, I'm not going to buy a new bearing. I think I'll just scratch my head for a while.

I think I still have the original electric pump in a plastic bag some place in the garage. 

Monday, May 15, 2017

Water Foot Pump Parts

How many parts does a water foot pump have? Way too many.


Plus, I forgot to take pictures during the disassembly process and got confused about how the four valves are set up. Staring at the pump's schematic drawing in Nigel Calder's boat maintenance book only made me more befuddled. Finally, I applied some basic logic and even laughed out loud on realising how simple it really was.

There it is, ready for operation. I discovered a sliver of wood in one of the valves, which explains why it went from working perfectly to suddenly being hard to pump and producing tiny squirts of water. How a small sliver of wood got into the water tank is a mystery.

Now it pumps great, but leaks like the devil. Either I didn't tighten it enough or a seal didn't seat the way it should. The good news is that I can now take it apart and reassemble it in a flash, compared with the 2.5-hour struggle the first time around.

Finished just in time for lunch. Cooked up my famous vegetable stew over pasta. No meat, no fish, no wine, just hunger and food. I've gone from 94 kg to 87 kg in 2 years. Slowly but surely. No magic trick, merely a bit less food and more exercise. The finish line is 85 kg. At 1.85 m tall, that sounds reasonable to me.


Still steaming and mighty delicious!

After walking around the marina with a big cup of coffee talking to other boaters, I tackled the battery project. My big Varta 180 AH (200 euros) house battery died last year at anchor in Culatra (after 8 years in service and one successful resuscitation). It was paralleled with the old engine battery which, in addition to being old, only has about 75 amp hours. Since my jeep died a couple of weeks ago (overheated), I decided to add its battery to the bank. I also recovered the battery boxes from my ocean-crossing days that used to contain expensive deep cycle batteries, which died early anyway.


When you have a wind generator or solar panel - especially with a modern regulator that will keep batteries ship-shape through an equalising, float and boost program - there's no need for expensive deep cycle batteries. Any run-of-the-mill battery will last a long time if you don't overload it.

Time is flying. Another two months or so and I'll be sailing south again. I still need to:
1. Redo the quarter berth in komacel
2. Rearrange/rebuild the boarding ladder system
3. Sew two small rips in the mainsail cover
4. Scrape the paint from the boom (maybe even scrape the mast paint some more)
5. Dive in and scrape the propeller clean

And a few other minor chores. Basically, a strong naked boat is always ready to go, as long as the skipper is also ready. Here's my list of essentials, the rest is frills:
1. A good autopilot
2. A GPS/chartplotter
3. A good engine
4. Sails
5. Desire


Wednesday, March 22, 2017

Bare Aluminum Mast

If you're bored reading yet another post about my mast-climbing heroics, just imagine how I feel. I'm the one doing the climbing, grunting and scraping! Funny thing is I like it.


Everybody is asking (telling) me, "Why don't you take the mast down, lay it on some sawhorses, use some power tools, get it over with and act like a normal person?" To which I reply (or think to myself), "If I were normal, I wouldn't own a sailboat." What am I supposed to do in my spare time, learn to play cards?

Besides, it's no big deal, another 50 or 60 hours dangling up there and I'll finish the job. I might even wax it in the end. If I were younger and keeping Jakatar for an extended period, after a good "up-and-down" sanding, I'd wet sand it every 3 years with penetrating oil and it would look flashier than a Los Vegas neon sign. 

I experimented using a 2000 watt heat gun and a scraper (Ryker's suggestion, the man knows everything, almost), and it worked really well. The mast barely warms up. The trick is to maintain the scraper's edge hot, you know, much like the hot knife and butter analogy. The heat gun is good for working at deck level, but higher up the mast swinging on the top-climber I'd surely burn my nose off sooner or later, and might even look better for it.


This is a semi-finished section. The yellow blotches are etch primer that need to be sanded with very fine sandpaper, maybe 400 grit. I tried a green SOS pad (basically a dish-washing pad) but it didn't do the trick, it didn't do anything. A light sanding (always in the up-down direction) will bring it to a nice homogeneous shine. The blotches that developed under the paint must also be eliminated if it's going to look respectable.

Skeptics may point out that I'll be wearing  the mast away by sanding it. But, believe me, its a thick-walled heavy duty stick compared to the flimsy paper-thin masts on production boats. If I sand 500 grams or even 1 kg from the 50-foot mast, that means it will most likely last only 99.9 years instead of 100. And it must be good quality aluminum too because previously scraped spots basically stay the same over time, almost like the bare hull of an aluminum sailboat. If it doesn't corrode or go black, why paint it? I've never seen a painted Ovni sailboat or their owners fretting about it.


Look at that, from a short distance the bottom section, not yet finished, already looks like serious business. A real mast, a mast worthy of a tough blue-water sailboat.

How people can live fulfilling lives without a boat is beyond me...unless they just fell in love or some dang thing like that. But then again, anything that makes sense is beyond me anyway, so no hard feelings.

BREAKING NEWS
I've decided to buy another boat in the near future. A small production sailboat that will heel like mad with the wind in my teeth, a prayer in my pocket and just enough food and water to make it there, wherever that will be. I definitely don't want to die watching TV and eating croutons.


If I don't fall from the mast first, that is.

Bare Aluminum Mast

If you're bored reading yet another post about my mast-climbing heroics, just imagine how I feel. I'm the one doing the climbing, grunting and scraping! Funny thing is I like it.


Everybody is asking (telling) me, "Why don't you take the mast down, lay it on some sawhorses, use some power tools, get it over with and act like a normal person?" To which I reply (or think to myself), "If I were normal, I wouldn't own a sailboat." What am I supposed to do in my spare time, learn to play cards?

Besides, it's no big deal, another 50 or 60 hours dangling up there and I'll finish the job. I might even wax it in the end. If I were younger and keeping Jakatar for an extended period, after a good "up-and-down" sanding, I'd wet sand it every 3 years with penetrating oil and it would look flashier than a Los Vegas neon sign. 

I experimented using a 2000 watt heat gun and a scraper (Ryker's suggestion, the man knows everything, almost), and it worked really well. The mast barely warms up. The trick is to maintain the scraper's edge hot, you know, much like the hot knife and butter analogy. The heat gun is good for working at deck level, but higher up the mast swinging on the top-climber I'd surely burn my nose off sooner or later, and might even look better for it.


This is a semi-finished section. The yellow blotches are etch primer that need to be sanded with very fine sandpaper, maybe 400 grit. I tried a green SOS pad (basically a dish-washing pad) but it didn't do the trick, it didn't do anything. A light sanding (always in the up-down direction) will bring it to a nice homogeneous shine. The blotches that developed under the paint must also be eliminated if it's going to look respectable.

Skeptics may point out that I'll be wearing  the mast away by sanding it. But, believe me, its a thick-walled heavy duty stick compared to the flimsy paper-thin masts on production boats. If I sand 500 grams or even 1 kg from the 50-foot mast, that means it will most likely last only 99.9 years instead of 100. And it must be good quality aluminum too because previously scraped spots basically stay the same over time, almost like the bare hull of an aluminum sailboat. If it doesn't corrode or go black, why paint it? I've never seen a painted Ovni sailboat or their owners fretting about it.


Look at that, from a short distance the bottom section, not yet finished, already looks like serious business. A real mast, a mast worthy of a tough blue-water sailboat.

How people can live fulfilling lives without a boat is beyond me...unless they just fell in love or some dang thing like that. But then again, anything that makes sense is beyond me anyway, so no hard feelings.

BREAKING NEWS
I've decided to buy another boat in the near future. A small production sailboat that will heel like mad with the wind in my teeth, a prayer in my pocket and just enough food and water to make it there, wherever that will be. I definitely don't want to die watching TV and eating croutons.


If I don't fall from the mast first, that is.

Thursday, February 16, 2017

Performance Pocket Cruiser Review no. 1 - Etap 26i

Candidate no. 1 - Etap 26i

Downloadable Owner's manual (pdf)


Aesthetic appeal

The Etap 26i was love at first sight. I'm enamoured with its looks, layout, construction quality, and unsinkability. It can be sailed with a hole in the hull, but what I really like about this feature is that a leak will not sink it when docked or anchored (dealing with a sunken boat is a huge logistics headache).


Another thing I really like about the Etap 26i is its interior. The cabin is flooded with light, and you can look where you're going and up at the sails while making lunch. A small boat interior can't get much more cheerful than this.

The stern has a very inviting swim platform which also looks like a dream for stepping into and out of the dinghy. Although it's a modern production boat, it has the look of a serious cruiser (which it isn't).  


The interior plan is standard for an modern 8 m sailboat, which is good. I don't see how anyone could significantly improve the layout in this size of boat. Perfect for a solo sailor.


Hull, rig and engine

The Etap company has closed, but this is what they used to say about the Etap 26i
- The only unsinkable Yachts in the world
- Condensation free
- Highly thermal and acoustic insulation
- Double-skinned deck and hull give stable structure
- Interior in sound structural polyester
- High resale value

Etaps aren't merely unsinkable, they can still be sailed even when holed. Here's a report in a Yachting Monthly article about testing a flooded Etap 21i:

"Gert, the Etap representative onboard, has done this a few times, most notably in a 24-ft Etap, crossing the Channel twice in a day with the boat flooded. He estimated that flooding slows the boat down by 1 knot, not bad considering he reefs to reduce strain on the rig."

Note that the following photograph is of an Etap 21i.
The bunk locker lids were barely awash when the water ingress stopped (Etap 21i). ~ Courtesy of Yachting Monthly
I don't like the saildrive configuration, and the 10 hp power engine may be under-muscled for motoring against waves, wind and current on my way back north. Sailing solo between ports (with legs up to 60 miles), I don't have the luxury of tacking my way up the coast when the wind is on the nose. There is too much traffic to take naps and too many fishing net markets to motor at night. I've been trapped twice already, and diving in to cut the boat and prop free is no picnic.

I don't know what to think about Etap's that come with a shallow tandem keel. If the tandem keel works as well as the designer says, what's there not to like? If they don't perform as well, and I happen to buy one, a shallow draft has a number of advantages.

The tandem keel consists of two short keels joined by a bulb.
Etaps with a fin keel are, I presume, more efficient upwind, but the tandem keel would be great for anchoring closer to shore where it's less crowed and for exploring shallower areas in the coast of Algarve where I don't dare go with my current Corbin 39. It would also make it easier to careen the boat on a sand bank to scrub the bottom, scrape he prop, change the anode or just for fun!

My first impression is that the sail plan and rig seem to be more suitable to day-sailing than for my cruising trips along the Portuguese coast, which is known for its somewhat boisterous trade winds and severe conditions at various capes, particularly on hot afternoons.

I need a boat that sails well downwind (when I go south) and reasonably well upwind (when I return sailing north). I hate motoring unless there's no alternative, then I live with it.

Here is an Etap 26i sailing:


The Bergstrom rig on the Etap 26i has no backstay, which is compensated by its swept-back spreaders. This also explains its large main sail with a generous roach and small self-tacking genoa.

I've noticed, such as in the above film, that some owners upgraded to a larger genoa. I would suspect they were unhappy with the smaller sail's performance. But since the rig was designed for a small genoa, could a larger genoa pose a risk in stronger wind?


The boat's setup raises at least two key issues: its ability to sail downwind efficiently; and its capacity to cope with strong wind on a beam reach, particularly with its ballast  displacement ratio just shy of 30%.

When sailing downwind, the swept-back spreaders prevent easing the mainsail far enough for optimum performance. This problem could be overcome by employing a smallish and easy to handle asymmetrical spinnaker. After all, I'm not trying to break speed records, I merely want to sail from port to port fast enough to arrive before dark rather than having to motor and/or motorsail.


The problem of not being able to fully ease out and depower the main sail in strong beam-reach winds is more worrisome. And believe me, if you cruise Portugal's coast and its nasty capes where winds can escalate from a breeze to vicious storm-like winds in minutes, not being able to depower a large main could put a huge load on the rig and sails and even lead to a wind-and-wave induced broach. In this scenario, a solo sailor also has to struggle to maintain his balance in a steeply slanted and unstable cockpit at at time when he must act fast to bring the boat under control, especially since the autopilot will almost certainly be overpowered.

Reef, reef early and deeply, the experts say. I say it too, but sailing is not always that simple or logical. I don't always follow this advice on my current boat, a Corbin 39, but that's because it's built for hell and high water.

On the other hand, the small genoa combined with the battened mainsail may be great for upwind sailing...at least that's what I think and hope.


Price

Ads in February 2017:

Year of build       Asking prices in euros
1995                    21,570 / 24,000 / 26,000
1996                    25,000
1999                    26,000
2004                    33,000

And what are the forums saying about this boat:

"I have an Etap 26i (as opposed to the older 26) fixed keel (not tandem) and she's a great boat. The self-tacking jib makes for a stress free time in busy waters and as an etap owner already you'll know the benefits of the double skin and buoyancy (although ok, storage can be less). The only thing I would say is that due to the Bergstrom rig with swept back spreaders, you have to gybe a bit more as a straight down-wind jaunt puts the main onto the spreaders... my next step is to look into a spinnaker to sort that out."

"I owned one for 5 years after upgrading from a 22 Etap. Great sailing boat. Can't think of any negative aspects. I sailed with our family of 4 kids , later bought a 30 Etap so sailed etaps for 15 years. Couldn't afford a 35 so switched brands."


More information may be added to this post. In the meantime, It's a boat to take seriously in my quest to be a happy sailor.